spinelli
Pros and Cons of Laminate Flooring in Kitchen
The Advantages and Disadvantages of Laminate Flooring in the Kitchen
Laminate flooring has become increasingly popular over the years, and its no surprise why. With its affordability and wide range of styles and colors, laminate flooring has become a go-to choice for homeowners looking to update their kitchen floors. However, like any flooring option, laminate has its pros and cons. In this article, we will explore the advantages and disadvantages of laminate flooring in the kitchen, helping you make an informed decision for your home.
Advantages of Laminate Flooring in the Kitchen:
1. Affordability: One of the biggest advantages of laminate flooring is its affordability. Compared to other flooring options such as hardwood or ceramic tiles, laminate is much more cost-effective. It offers the look of real wood or stone without the hefty price tag, making it perfect for homeowners on a budget.
2. Easy Installation: Laminate flooring is incredibly easy to install, especially if you opt for the floating floor method. The planks simply snap together, eliminating the need for glue or nails. This not only saves time but also reduces the cost of professional installation, as it can often be done as a DIY project.
3. Durability: Laminate flooring is highly resistant to scratches, stains, and fading, making it an ideal choice for high-traffic areas like the kitchen. With a protective top layer, laminate floors can withstand spills, dropped utensils, and heavy foot traffic, while still maintaining their appearance for years to come.
4. Variety of Designs: Laminate flooring comes in a wide range of designs, mimicking the look of hardwood, tile, or even natural stone. This gives homeowners plenty of options to match their kitchen decor and achieve the desired aesthetic without breaking the bank.
Disadvantages of Laminate Flooring in the Kitchen:
1. Susceptible to Moisture Damage: While laminate floors are durable, they are not completely waterproof. Excessive water exposure can cause the planks to warp or swell, leading to damage. Therefore, it is important to promptly clean up any spills or leaks to avoid long-term issues.
2. Limited Repairability: Unlike hardwood, laminate flooring cannot be refinished or sanded down to fix scratches or dents. In the event of serious damage, the affected planks may need to be replaced entirely, which can be costly and time-consuming.
3. Lack of Authenticity: While laminate flooring does an excellent job of imitating natural materials, it cannot match the authenticity of hardwood or stone. Some homeowners may prefer the genuine texture and feel of real wood or tile, and may find that laminate does not provide the same level of sophistication or elegance.
4. Environmental Impact: Laminate flooring is typically made from composite wood materials that may contain harmful chemicals such as formaldehyde. While many manufacturers have made efforts to reduce these emissions, it is important to choose low VOC (Volatile Organic Compound) options if you are concerned about indoor air quality.
In conclusion, laminate flooring in the kitchen offers numerous advantages such as affordability, easy installation, durability, and a wide variety of designs to choose from. However, it is important to consider the disadvantages such as susceptibility to moisture damage, limited repairability, lack of authenticity, and potential environmental impact. By weighing these factors, you can make an informed decision and find the perfect flooring option that suits your budget, lifestyle, and aesthetic preferences.
Pros and Cons of Granite Kitchen Countertops
Choosing kitchen countertops is one of the most essential and delicate option decisions you’ll make if you’re renovating or building a new kitchen. The countertops not only serve as a long-lasting surface for cooking, eating, and socializing in the kitchen, but they’re also one of the first things you notice when you enter. However, you should also have its alternatives in mind considering the possible drawbacks. Here are some pros and cons of granite kitchen countertops to look out for.
What are the Pros of granite Kitchen countertops?
Granite is durable, and few substances can stain or scratch granite. Granite is also resistant to heat and usually stays cool to the touch, beneficial if you constantly cook with high heat. Let’s delve into the detailing factors again.
1. The Durability Factor
Granite is one of the most durable types of countertop materials available. It can withstand heat up to 500 degrees Fahrenheit, making it perfect for stoves, ovens, and sinks.
2. Stain-Resistant Qualities are Main Pros of Granite Kitchen Countertops
The same qualities that make granite strong also help to protect its potency against stains and scratches. The best granite countertops are harder than stainless steel or ceramic tile surfaces commonly found in kitchens.
3. Versatile
Granite comes in many different colours, so you have many options when choosing your ideal kitchen countertops colour scheme. Selecting a matching colour palette will ensure that your new granite can be a part of the overall design theme in your kitchen or even your bathroom.
4. Aesthetic Appeal
Granite is often called a “natural stone” because of its beautiful and unique patterns. Depending on the other materials you choose for your kitchen, it can be used to create either a rustic or modern look.
5. Low-Maintenance
Who would want to spend an entire day just cleaning the kitchen? Well, granite doesn’t require any special care or maintenance beyond an occasional wipe-down with a wet cloth to keep it looking shiny and new. You can get it done within minutes, which is one of the time-saving pros of granite kitchen countertops.
What are the Cons of Granite Kitchen Countertops?
And then, there are some drawbacks to consider when looking at granite countertops. Because of the natural nature of the material, it will have variations in color and texture due to each piece being unique.
1. Price
Granite is one of the most expensive kitchen countertops on the market. You should expect to pay at least $50 per square foot for a quality slab of granite. This may be prohibitive for some homeowners on a tight budget.
2. Weight is another Drawback of Granite Kitchen Countertops
Granite is a weighty material, so it can be challenging to move around once it’s installed in your kitchen. You’ll need at least two people to lift and carry a slab of granite, and you may want to consider hiring a professional to install it for you.
3. Fragility
Although granite is one of the most durable materials available, it is still susceptible to chips and cracks if not treated with care. It’s important to avoid using sharp objects on your granite countertops and avoid putting too much weight or stress on them.
4. The Repairing Factor is one of the Considerable Cons of Granite Kitchen Countertops
If a chip or crack does occur on your granite countertop, it can be difficult (and expensive) to have it repaired. You may need to hire a professional to do the job, and the results may not be perfect.
5. Susceptibility to Heat Damage
Although it’s suitable for moderate heat, it is still prone to excessive temperatures. High levels of heat can damage granite, so it’s not recommended to use near stoves, ovens, or other heat sources. So, if your kitchen usually involves high heat work, keep this issue as one of the common cons of granite kitchen countertops for you.
Final Thoughts on Granite Kitchen Countertops Pros and Cons
Granite kitchen countertops offer several benefits and come with a few drawbacks, such as price and weight. When considering whether or not to install granite countertops in your home, it’s essential to weigh all the pros and cons to make the best decision for your needs. Many homeowners often choose the alternatives just because of these two reasons.
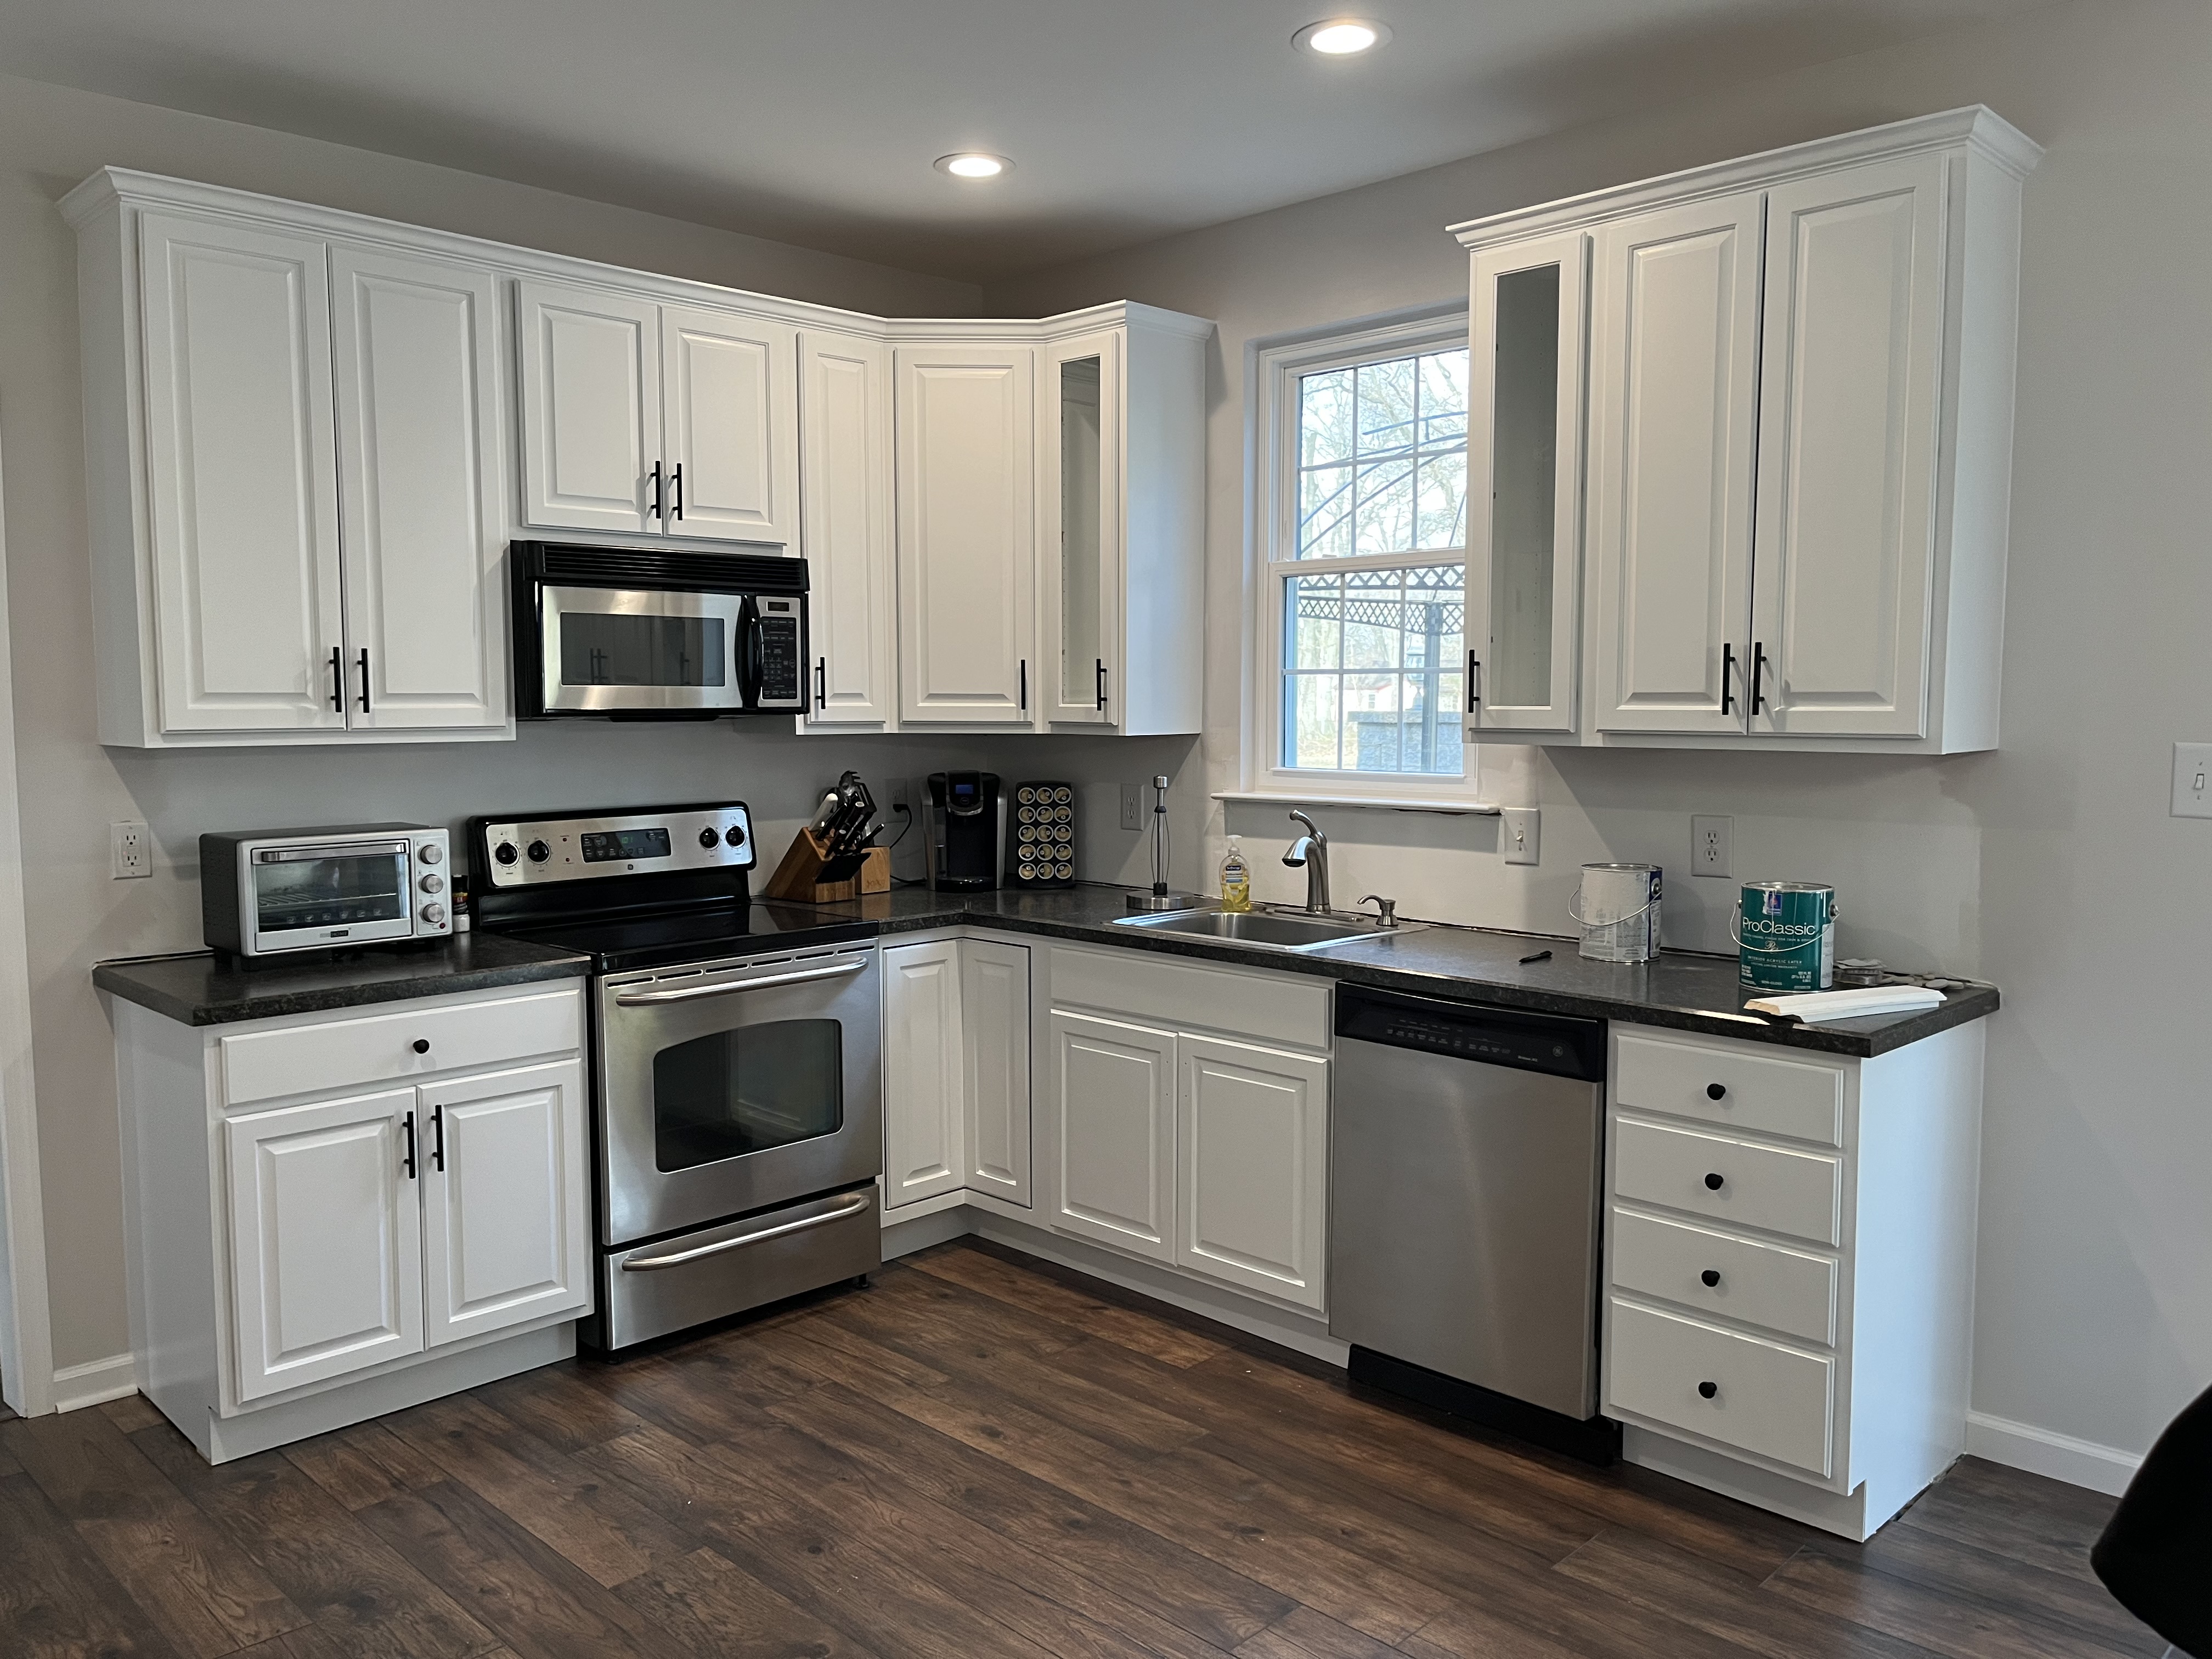
Pros and Cons of White Kitchen Cabinets
Your kitchen is the center of activity for your family. It’s where you make your morning coffee; it’s the cozy and inviting location where family gatherings are sure to happen. The kitchen is the room in your home where Cabinetry is the most essential aspect of every kitchen as you have to make use of almost every time you step inside the kitchen. Thus, painting them with the right color combination can help you put together the aesthetics and the longevity factors. Here are some of the Pros and Cons of White Kitchen Cabinets to consider.
What are the Pros of White Kitchen Cabinets?
If you are remodeling your kitchen in a quiet countryside home, you bet nothing is more complementary than white cabinets. Here are some pros of white kitchen cabinets you need to know.
1. They are Timeless and Will Never go out of Style
One of the benefits of white kitchen cabinets is that they are very versatile and can go with any type of décor. You can have a modern, traditional, or country-style kitchen and white cabinets will still look great.
2. They are Bright and Airy
White kitchen cabinets are very bright and airy, perfect for small kitchens. They make the room look larger and more open.
3. White is for Peace
White kitchen cabinets are known to create peace and calm, making them perfect for meditation spaces. The feeling of being surrounded by nature on a calm day in a calm kitchen; priceless.
4. Sanitary Factors are Significant Pros of White Kitchen Cabinets
When food preparation and contamination concerns influenced the history of kitchen design, white kitchens became more popular. Because dirt and spills are visible, you can quickly clean up spills and keep your kitchen germs and bacteria-free. White cabinets will enhance the sensation of cleanliness that no other color can create.
What are the Cons of White Kitchen Cabinets?
The bright, peaceful color may turn out to be the wrong choice if you’ve already set up your kitchen suitable for Dark Cabinets or a multitude of wall colors. Here are some other cons of white kitchen cabinets you should heed before splashing all white.
1. They can Get Dirty Very Easily
While white kitchen cabinets are easy to clean, they can also get dirty very easily. If you do not keep them clean regularly, they will start to look dingy and faded.
2. Unsuitable for Kitchens with a Lot of Traffic
Too many people stepping inside the kitchen means too many spills and stains. White kitchen cabinets may not be the best choice for kitchens with a lot of traffic, as they can show dirt and dust more quickly than other cabinet colors.
3. Difficult to Match with Specific Color Schemes
If you are looking for white kitchen cabinets but have a specific color scheme in mind that does not include white, it can be challenging to find matching cabinets. Mismatched colors can lead to presentation problems among many cons of white kitchen cabinets. You can opt for Grey Kitchen Cabinets instead.
4. They can be too Bright for Some People
White kitchen cabinets are very bright and may not be the best choice for people who prefer a darker or more subtle color scheme in their kitchens.
5. Daily Maintenance is one of Concerning Cons of White Kitchen Cabinets
White kitchen cabinets are very high-maintenance and will need to be cleaned regularly. They also cannot withstand harsh chemicals, so you must use the proper cleaning solutions to remove tough stains from your white cabinets.
6. They can be Very Costly
White kitchen cabinets can be very expensive, especially if you are looking for a high-end cabinet design. They may not be the best choice for budget-minded homeowners.
Final Comments on the Pros and Cons of White Kitchen Cabinets
In conclusion, both the pros and cons of white kitchen cabinets should be considered before making your final decision. White kitchen cabinets are a classic choice, yet they can add to your legwork putting more stress on your budget.
Pros and Cons of Single Bowl Kitchen Sink
Kitchen sinks accompany you from the moment you prepare food till the moment you call it a day. When it comes to selecting a new sink, you have many alternatives, not just in terms of material and form but also layout. Sinks come in various sizes, with single and double bowl sinks being the most common. Both have advantages and disadvantages; this guide focuses on the pros and cons of single bowl kitchen sink to help you understand your needs better.
What are the Pros of Single Bowl Kitchen Sink?
There are many pros of single bowl kitchen sink; It’s also the perfect option for people who don’t want too much cleaning up after dinner, as most dishes can be washed in the same bowl that food was cooked in. let’s have a look the most prominent and common ones.
1. It’s Perfect for Small Spaces
A single bowl kitchen sink is space-saving. This type of sink is the best option for people who have a small kitchen because it occupies less countertop space than sinks with two or more bowls.
2. Cost-effectiveness is Among Promising Pros of Single Bowl Kitchen Sink
Installing a single bowl kitchen sink is cheaper than installing a sink with multiple bowls because it only requires one drain rather than two.
3. You can Modify it Easily
You can modify it easily if you want to add a faucet or change the sink style that requires less effort with single bowl sinks than other options. In addition, if your current sink is damaged beyond repair and needs replacement, changing out the entire unit is also easy in this case.
4. They’re Easy to Maintain & Clean
One of the significant benefits of single bowl kitchen sinks is easy maintenance. They are also easy to clean; there’s nowhere for dirt and food particles to hide with no dividers or extra compartments. You can quickly wipe down the entire surface with little effort, keeping your kitchen looking fresh and tidy at all times.
5. Excellent Choice for Busy Families
A single bowl sink is a great option if you have a busy family and are always on the go. There’s no need to worry about dividing up the dishes between multiple basins; you can do everything in one place. This can save you time and hassle when meal preparation and cleaning.
What are the Cons of Single Bowl Kitchen Sink?
Whether Granite, composite, Ceramic, or Copper, a single kitchen sink has similar cons that are common for every homeowner. Let’s have a look at what you should consider.
1. It can be Bulky
One potential downside of single bowl kitchen sinks is that they can be pretty bulky. This may not be an issue for some homeowners, but it’s something to keep in mind if you have a small kitchen.
2. It’s too Small for Large Pots and Pans
One of the concerning cons of single bowl kitchen sink is that they can be challenging to use with large pots and pans. If you’re often cooking for a crowd, the single-bowled ones may not be the best option for you.
3. You Can’t Multitask with a Single Bowl Sink
It’s worth noting that you can’t multitask with a single bowl sink. This means that if you’re trying to wash the dishes and rinse off fruits and vegetables simultaneously, you’ll have to do it in two separate places. If this is important to you, you may want to consider a double sink type of sink.
4. It can be Difficult to Keep Organized
One final disadvantage of single bowl sinks is that they can be difficult to keep organized. If you’re not careful, it’s easy for dishes and other kitchen items to accumulate and create a cluttered look. This can be a challenge if you’re short on storage space in your kitchen.
5. Discomfort is also one of the Concerning Cons of Single Bowl Kitchen Sink
Dishes may not be adequately washed if the water flow is too low or unevenly distributed. The user’s discomfort or injury may also occur if the sink is too hot for dishwashing.
Final Comments on the Pros and Cons of Single Bowl Kitchen Sink
Consider other factors such as counter space, cabinetry, and countertop material before choosing a single-bowl sink. Choose from various kitchen sink designs and sizes that match your needs. On the other hand, a single basin sink allows for more faucet options, is less expensive, is easier to maintain, and provides more space for washing bigger things that can’t go in the dishwasher. For a better understanding, you can always find these Pros and Cons of Single Bowl Kitchen Sink great help.
Stove In Corner of Kitchen Pros and Cons
Corner stoves, also known as island stoves, are standard kitchen appliances. When corner stoves are built, an interior “false wall” is installed in the corner of the room, enclosing a triangular column of space. This is typically due to space limitations, but it can also be done on purpose. Corner stoves, on the other hand, maybe placed against the wall. There are, however, safety concerns with corner stoves installed in this manner. This kitchen improvement guide focuses on the Stove in Corner of Kitchen Pros and Cons you should know.
What are Stove in Corner of Kitchen Pros?
Having a cooking stove in the corner means you’ll have many benefits. Let’s look at the stove in corner of kitchen pros and have good reasons to build one.
1. Increased cooking space
When installed in the kitchen corner, a stove takes up less counter space than when it is placed against a wall. This can be an important consideration if your kitchen is small.
2. Increased Storage
A cabinet or pantry can be built into the “false” wall surrounding the stove, providing extra storage for pots and pans, spices, or other cooking supplies.
3. Increased ventilation
A stove installed in the corner of a room allows for better ventilation than one against a wall. This is especially important if you have an exhaust hood or fan over the stovetop.
4. Aesthetically Pleasing
A stove with a hood and ventilation fan creates the look of an island or peninsula, giving your kitchen a more open feel. It can also help to make small rooms appear larger.
5. Safety Advantages
Corner stoves installed in the corner of a room do not pose a great danger should they catch on fire and can be easily contained. However, if installing against a wall, there are safety concerns about potential fires that might arise from this location.
What are stove in Kitchen Corner Cons?
Installing a stove in the corner means there are safety concerns first if there is no window just behind or next to it. Furthermore, there are other stove in kitchen corner cons on the listed.
1. Increased Fire Risk
There is a greater chance of fire spreading when a stove is placed in the corner of a room. It’s important to take all necessary precautions to prevent fires, including proper installation and use of venting systems.
2. Limited Counter Space
If your kitchen is small, installing a stove in the corner might not leave enough counter space on either side for food preparation and other tasks. It might be better to place the stove against a wall in this case.
3. Difficulties with Ventilation
It can be difficult to properly ventilate hoods and fans over stovetops placed in the corner of a kitchen. This is especially true if your kitchen has an older design or was not built for this type of installation.
4. Safety Disadvantages of Installing Stove in Kitchen Corner
There are no set standards for how close your stove should be to the wall, although you should verify your city’s building codes to ensure that your kitchen design follows all safety measures.
However, due to the fire danger posed by having the wall exposed to lengthy and intensive heat, it is still advised that your stove’s range burners be at least 12 inches (1 foot) away from the sidewall.
5. Limited Storage
As mentioned earlier, a built-in cabinet or pantry can provide extra storage space for pots and pans, spices, or other cooking supplies. If your kitchen does not have this feature, you may need to find another place to store these items.
Conclusion on the Pros and Cons of Stove in Kitchen Corner
If you install a stove in your kitchen, be prepared to manage the grease. Using a splatter screen or a grease guard while cooking, as well as utilizing grease-resistant paint and a backsplash will keep your kitchen looking clean and beautiful. It’s all a matter of personal taste. However, specific style solutions may be used to build a kitchen interior. For example, in a tiny-sized corner kitchen, you should use a design to make the space seem more significant visually. The rest is tending to the pros and cons of stove in kitchen corner closely.
Pros and Cons of Chalk Paint on Kitchen Cabinets
Chalk Paint is a classic option to have your cabinets colored, and the best part about it is that you can apply it on any surface you want. It’s non-toxic, durable, and easy to use. Furthermore, it doesn’t require priming or sanding, making it the perfect time-saving option for most painting tasks. But you do need to have the experience to use it. Most importantly, you need to be familiar with the Pros and Cons of Chalk Paint on Kitchen Cabinets.
What are the Pros of Chalk Paint on Kitchen Cabinets?
Chalk paint is very durable, like latex paint. It resists chipping, scratching and fading. It’s also very easy to apply because it doesn’t require priming first. Major Pros of chalk paint on Kitchen Cabinets are non-emission of odor and non-toxic elements after its application. Hence, you can enjoy cooking and other chores without any issues. Here are some notable benefits of using chalk paint.
1. It Dries up Quickly
Chalk paint dries up quickly, which can be a great advantage if you are looking for ways to save time on your project. It takes less time to settle on the surface; you can tend to other things in your kitchen once you finish one. The less setting counts as one of the pros of chalk Paint on kitchen cabinets, especially when you have other tasks to take care of.
2. It’s Eco Friendly
The chalk paint also doesn’t contain any Volatile Organic Compounds (VOC), and it’s nontoxic, making it a much safer product to use in the kitchen. You can ensure the air quality remains unaffected using chalk paint on the surfaces.
3. It Requires Fewer Coats of Paint
It also requires fewer coats of paint than other types, such as latex. Most chalk paints only require two to three coats, which makes it a cost-effective option too. Fewer coats mean you don’t have to overuse the paint reducing the overall painting costs.
4. You don’t need a Primer
Chalk paint is a kind of latex paint, and thus it doesn’t require an additional layer of primer. However, if you are using oil-based paints for your cabinets to achieve the weathered look, priming them first with high-quality products such as Zinsser’s Bulls Eye would be advisable before applying chalk paint on kitchen cabinets.
5. One of the Potential Pros of Chalk Paint on Kitchen Cabinets is that it hides holes and scratches
Chalk paint is a very forgiving kind of paint, and it hides holes and scratches quite easily. If you have some nicks or worn-out surfaces on your cabinets due to excessive use, then chalk paint can be an ideal option for you as far as updating kitchen cabinets goes.
What are the Cons of Chalk Paint on Kitchen Cabinets?
Do bear in mind some of the possible Cons of Chalk Paint on Kitchen Cabinets depending on your kitchen space, final touch, and long-lasting effects.
1. It’s Too Thick
Chalk paint is very thick, and it doesn’t have the consistency of latex or oil-based paints. This can be a disadvantage if you look to completely cover all surfaces on your cabinets with just one coat of chalk paint.
2. You Need to Have Experience with Paint
You need to have a certain degree of experience with painting and some practice before trying out this type on your cabinets. Chalk paints are especially tough to apply if you aren’t very good at handling different kinds of brushes or rollers.
3. It Can Make the Kitchen Look Bad
If you want to achieve the perfect look for your kitchen, chalk paint might not be ideal. Chalk paints can make cabinets appear too rustic if applied poorly onto surfaces that aren’t very smooth or primed properly. This can turn out to be one of the possible cons of Chalk Paint on Kitchen Cabinets when you have invested in the presentation itself.
4. Chalk Paint Can Turn Surfaces Uneven
The thickness factor of chalk paint can also turn the surfaces on your cabinets uneven when it dries up. You will need to sand down these areas and apply a decent primer before you think of applying chalk paint to achieve the ideal aged look for your kitchen.
5. Less Flexibility is among many Cons of Chalk Paint on Kitchen Cabinets
This paint can’t be sanded if mistakes are made; you may end up doing some serious damage if you sand too much. To avoid these kinds of problems, always use the same tools for the job and cover all surfaces in any way you can to prevent accidents.
Conclusion on the Pros and Cons of Chalk Paint on Kitchen Cabinets
It is a good idea to prime your kitchen cabinets before applying chalk paint. You will get better coverage, and it won’t peel off as easily if you do this step first. If you want the best look, use an oil-based primer with a high gloss finish. Let the primer completely dry for at least 24 hours before painting it again. Though it may seem easy to apply, the pros and cons of chalk paints on kitchen cabinets are a must when it’s all about your favourite place in the house.
Pros and Cons of Butcher Block Kitchen Countertops
Are you planning to install a butcher block countertop in your kitchen? Warmth and flexibility factors are the ones that attract many homeowners, and they can turn your house look more like a country home. Wooden butcher block countertops have a variety of appearances depending on the species and grain and whether it is stained for a deeper tone or sheen. Butcher block is also kiln-dried and pre-sanded, ensuring that it will last years without warping. Butcher block countertops are a popular material for kitchen counters. They can give your kitchen an inviting, rustic look but be certain of the pros and cons of butcher block kitchen countertops before installing them in your home.
What are the Pros of Butcher Block Kitchen Countertops?
There are many benefits that you can get from having butcher block countertops in your kitchen. This includes the following:
1. It is Easy to Clean Up
Wood, especially unfinished ones, can be very durable, and it also repels liquids to keep the wood dry for a longer period. This makes the surface easy to clean up after use. Even if you drop something on it or spill some liquid on them, all you need is water and soap to make things right again; no harsh chemicals are required.
2. Natural Design
It has a beautiful natural design that brings out your creativity since there are endless possibilities for decorating your kitchen with butcher block countertops. You can draw any design that you like onto the surface of the wood without having to worry about possible damage because butcher block countertops are very durable.
3. Variety is One of the Convincing Pros of Butcher Block Kitchen Countertops
Butcher block kitchen countertops can be found in different sizes that one can choose to depend on how big their kitchen is. After all, the size of their kitchen will also determine how many furniture pieces should they put inside it.
4. Affordable
Butcher block kitchen countertops are affordable even if they are made of wood. Since some people choose to make their wooden countertop, just like what other customers do when they have an old table that is no longer in use. But the table can be functional enough to be used as a surface for food preparation.
5. Environment Friendly
One of the main pros of butcher block kitchen countertops is they can be installed in people’s homes is because they are environmentally friendly. Not to mention how it can still last for a long time compared to other types of surfaces. Butcher block kitchen countertops can last up to 25 years depending on how well it is maintained.
The only thing that you need to worry about when it comes to wood would be surface scratches or cut marks but other than that; it should be pretty much intact even if you use sharp knives and utensils at home.
What are the Cons of Butcher Block Kitchen Countertops?
Although butcher block kitchen countertops may come with many benefits, there are also some drawbacks that you should expect. The following will explain why more and more homeowners are still choosing the alternatives such as Epoxy Kitchen Countertops.
1. Vulnerable to Stains
Saws, pruners, and other cutting utensils will scratch harder woods less than softer woods; however, all wood stains are cleaned promptly. Butcher block may be used as a cutting board by some people, but they invite germs, fungus, and even warping in the process.
2. Easily Damaged
Butcher block kitchen countertops can be easily damaged if they are exposed to water or moisture even once -this is why people need to learn how to maintain them for them not to spend too much money on repairs in the future when their butcher block countertops start looking worn out because of neglect.
3. Maintenance is one of the concerning cons of Butcher Block Kitchen Countertops
They need a little more care than you may think. To keep your wood looking its best over time, it needs regular care in the form of cleaning agents specifically designed for butcher block surfaces. This will help remove any food particles or other types of debris from the surface area without damaging them too much over time. If not treated regularly, spots could develop on top, which is hard to get rid of later if left untreated.
4. Susceptible to Heat and Fire
One of the possible cons of butcher block kitchen countertops is that they can be more susceptible to heat and fire than other types. While the wood itself most likely won’t catch on fire, it could potentially warp or crack if exposed to sudden extreme hot temperatures for too long. You’ll want to make sure your home’s heating system is in proper working order so as not to expose your countertop surface area to unnecessary damage.
5. Hard Installation
They do not come with easy installation, meaning that you need to spend more time and effort, especially if you want the surface of your butcher block kitchen countertops to blend with the surrounding environment.
Conclusion on the Pros and Cons of Butcher Block Kitchen Countertops
Butcher block kitchen countertops can be very beneficial for homeowners. Although their cost is higher than most materials used in the kitchen, they are worth it because of their durability. You do need an extra caring hand to prevent it from scratches and dings. The rest of the dos and don’ts should be cleared by detailed Pros and cons of butcher block kitchen countertops.
Pros and Cons of Painting Kitchen Cabinets
There are many pros and cons of painting kitchen cabinets which mainly relate to presentation, protection, expense, and maintenance. Whether you have hired a professional or it’s just one of your DIYs, you should be ready to take on the mess, the fumes, and the time it takes to complete the project.
What are the Pros of Painting Kitchen Cabinets?
Let’s get straight to it; be it a Grey Cabinet, Dark, or even white, you can transform your kitchen to your liking. Here are some pros of painting kitchen cabinets.
1. Minimal Expenses
A gallon of paint costs around $20 and can cover about 400 square feet. With a careful selection of colors, you can change the entire feel of your kitchen by painting the cabinets.
2. Added Beauty is one of the Pros of Painting Kitchen Cabinets
If you’re not thrilled with the color or style of your cabinets, painting them is a relatively cheap way to update them. You can also choose a glossy finish or matte, which will give your kitchen a different look.
3. They are Easy to Change
Painted cabinets are also easy to change if you decide you want a different look in the future. All you need to do is repaint them with another color or another type of finish. One of the many pros of painting kitchen cabinets comes to you in terms of prolonged life.
4. Protection
Painting kitchen cabinets also protect the wood underneath. Over time, moisture can cause mold and mildew to develop between varnish coats or other finishes applied to wood cabinetry. If you paint your cabinets instead of applying another finish, you avoid trapping moisture against the surface of the wood.
What are the Cons of Painting Kitchen Cabinets?
From getting equipped to avoiding the chips and scruffs, there are certain cons of painting kitchen cabinets you should be aware of.
1. Messy Job
You’ll need to cover every surface in your house with drop cloths before starting this project because it will get messy fast! Don’t forget about windowsills and baseboards as well as floors below where you’re working. It’s a good idea to use paper plates instead of regular dishes if they don’t have any surfaces either since even one accidental drip can ruin them.
2. Toxic Fumes are Common Cons of Painting Kitchen Cabinets
Paint and other finishes used on kitchen cabinets give off fumes that can be harmful to your health. Ensure you’re well ventilated when painting, and avoid breathing in the fumes.
3. It Takes Time to Complete
Painting kitchen cabinets is a time-consuming project, so make sure you have plenty of spare time before starting it. Depending on the size of your kitchen, it could take several days or even weeks to finish the job.
4. It’s a Challenging Project
Painting kitchen cabinets is not an easy task, and it can be tricky to get a smooth finish. If you’re not experienced in painting, it might be best to hire a professional to do the job for you.
Final Comments on the Pros and Cons of Painting Kitchen Cabinets
In conclusion, there are many advantages and disadvantages to painting kitchen cabinets. By weighing the pros and cons, you can decide if this is a project you want to undertake yourself or if you would be better off hiring a professional painter. Whether you choose to do it yourself or hire a professional, be prepared for a messy, smelly project with many potentials for headaches.
Kitchen Cabinet Painting Contractor
Spinelli Painting & Cabinet Refinishing
Pros and Cons of Kitchen Cabinets to the Ceiling
For decades, the typical ceiling height was 8 feet—a dimension that resulted from two 4-foot-wide drywall sheets laid together horizontally. However, homes are now being constructed with conventional 9 or 10-foot ceilings on the ground floor and 8 or 9 feet tall on the second floor.
Before 8-foot ceilings became standard in most homes, cabinets were often built to accommodate that height. Traditional cabinets may be extended all the way to the top of the roof by adding crown molding and trim between the cabinet tops and the roof. There are both pros and cons of Kitchen Cabinets to the Ceiling, which you must consider right before extending them.
What are the Pros of Kitchen Cabinets to the Ceiling?
With today’s higher ceiling heights, the prospective space above regular upper cabinets has expanded, and you must choose how high up the cabinets should go. The spacious advantage certainly adds more to the Pros of Kitchen Cabinets to the Ceiling.
1. Ceiling Height Cabinets give you a lot of Storage Space
This is especially true if your ceilings are high. With extra storage space, you can store all of your kitchen items in one place and have easy access to them. This can help keep your kitchen organized and tidy.
2. Ceiling Height Cabinets can be a great way to Showcase your dishes and Glassware
If you have beautiful dishes or glasses that you want to show off, ceiling height cabinets are the perfect way to do it. They provide extra space for storage and display, making them an excellent choice for any kitchen.
3. Fewer Maintenance Requirements are main Pros of Kitchen Cabinets to the Ceiling
You don’t need to clean as much if you don’t have that above-the-cabinet space to collect dust. You’ll have to dust even more frequently if you want to add attractive items to that area above the cabinets. Ceiling height cabinets eliminate the possibility of dust collecting on the top surface. Dust and grime can accumulate on a ceiling height cabinet’s top surface because there isn’t one.
4. They Add a Finishing Touch to your Kitchen
Ceiling height cabinets in a kitchen enhance its overall high-end look. When there are ceiling height cupboards, many people consider a kitchen to be more attractive and high-end.
What are the Cons of Kitchen Cabinets to the Ceiling?
Besides their benefits, also consider the Possible and prominent Cons of Kitchen Cabinets to the Ceiling. These limitations can turn more frequent if you have more stuff put on the topmost shelves.
1. Height
The disadvantage of kitchen cabinets to the ceiling is that they are difficult to access. To get anything, you’ll need a home ladder. Install them if there’s a pressing need for storage in your kitchen.
2. Ceiling Cabinets are an Expensive Option
Are you on a budget? Installing these cabinets in your kitchen would instantly double the cost of your project. Furthermore, if you want to go all out with glass doors and spotlights, don’t be afraid to let your purse strings loose.
3. Ceiling Cabinets can make your Kitchen Cramped
There may be such a thing as being over-cabinet. While double-stacked cabinets might give a more finished look, they can also obstruct your kitchen. Even glass door facades in tiny kitchens may suffocate the space and make it seem claustrophobic, while cabinets with darker colors and stains might make it seem inhospitable.
4. Bad appearance is one of the Main cons of Kitchen Cabinets to the Ceiling
Ceiling height cabinets might give a more finished appearance to smaller kitchens, making them feel claustrophobic and cramped. Dark cabinetry in a tiny kitchen is especially evident.
Final Thoughts on the Pros and Cons of Ceiling Kitchen Cabinets
So those were some pros and cons of taking your cabinets to the ceiling. The main things you need to consider here are the cost, ease of access, cabinet dimensions, and color options. If you have no idea about any of these, you can seek better ideas from home improvement professionals.
Types of Kitchen Countertops Pros and Cons
The right countertops are an essential part of any dream kitchen. You want your kitchen counters to be beautiful and long-lasting. There are a variety of criteria to consider when determining what sort of countertops you’ll choose for your kitchens, such as durability, cost-effectiveness, and attractiveness. So, to help you make this important decision, here are different types of kitchen countertops pros and cons.
1. Granite Kitchen Countertops
Although it may be costly and hefty, granite is a popular choice for its toughness and low maintenance. Granite worktops are highly valued in the real estate sector, giving every property an extra value. Granites are beautiful and sturdy, with a lifespan of decades. It offers homeowners a wide range of natural patterns, imperfections, and veins to choose from.
Pros: Granite Kitchen Countertops
- Adding values to properties
- Durable & Elegant
- Easy maintenance
- Heat-resistant
Cons: Granite Kitchen Countertops
- Difficult to install, requiring extra cost for professional installation
- Dulls the knives
- Expensive
- Porous, easy to get stained
2. Marble Kitchen Countertops
Marble is a classic beauty that can be used to add aesthetic value to a home. The surface of marble slabs has its own natural patterns and is heat resistant. While the surface is porous, you may seal it to reduce the likelihood of strong staining by keeping it sealed.
Pros: Marble Kitchen Countertops
- Elegant
- Heat and Water Resistant
- Increases the Home’s Resale Value
- Unique Designs
Cons: Marble Kitchen Countertops
- Difficult to install
- Easily stained
- Expensive
- Porous Surface
3. Soapstone Kitchen Countertops
Soapstone is one of the most popular countertops today. Soapstone was once associated with historic homes, but it is now preferred in contemporary kitchens. The material has a rich hue that gives the room a sophisticated look. Scratches can be permanent, but they add to the antique appearance.
Pros: Soapstone Kitchen Countertops
- Easy to clean
- Elegant and Classy
- Stain and heat resistant
Cons: Soapstone Kitchen Countertops
- Difficult to install
- Heavy
- Requires Regular Maintenance
4. Butcher Block Countertops
Another name for a wooden countertop is butcher block. It has a rustic look that would go excellent in a conventional kitchen. The most frequent countertops are hardwood, such as oak and maple, which have softer properties than granite or concrete.
Pros: Butcher Block Countertops
- Easily Cleanable
- Keeps knives sharp
- Beautiful and Classy
Cons: Butcher Block Countertops
- Easy to Crack/Chip
- Easily Stained
- Porous
- Easy to get affected by bacteria
5. Epoxy Kitchen Countertops
The same material that protects military planes is used to make epoxy countertops. It’s scratch, chemical, and heat resistant. Because the surface of this sort of countertop is scratch-resistant, you can paint it in any style you choose. You can have any type of marble or wood finish with epoxy paint.
Pros: Epoxy Kitchen Countertops
- Hard and Durable
- Adds to Kitchen’s beauty
- Less Maintenance
- Scratch-Proof
Cons: Epoxy Kitchen Countertops
- Expensive
- Turns Activities Noisy
- Health Issues
6. Stainless Steel Kitchen Countertops
A stainless countertop gives your kitchen a contemporary aesthetic. The form is continuous, and the surface is heat resistant. Stainless steel is easy to clean because of its sleek finish. It also has an industrial feel, which works well in a modern kitchen.
Pros: Stainless Steel Kitchen Countertops
- Easy to clean
- Heat resistant
Cons: Stainless Steel Kitchen Countertops
- Expensive
- Noisy
- Prone to Dents and Dings
- Not ideal for cutting
7. Ceramic Kitchen Countertops
Ceramic tile is one of the most aesthetically pleasing kitchen countertops for low-budget kitchens. It comes in a variety of colors and sizes. It may be put together by yourself with minimal DIY ability, and cleaning is a snap.
Pros: Ceramic Kitchen Countertops
- Cheap
- Available in various colors
- Easy to clean
- Heat resistant
Cons: Ceramic Kitchen Countertops
- Can get chipped/cracked easily
- Breeding grounds for mold and stains
8. Resin Countertops
With their intricate features, resin countertops really appeal to interior design fans. It has a beautiful appearance and is made from high-quality materials, including epoxy and polyester. It boasts great durability thanks to its construction from superior materials such as epoxy and polyester. The resin is heat resistant, UV resistant, and stain resistant in terms of function. The disadvantage is that it is closely linked with the market’s pricing fluctuations. The cost per square foot ranges from 51 to 127 USD.
Conclusion on Types of Kitchen Countertops Pros and Cons
When remodeling your kitchen, you’ll want to ensure that the features you need are available at a reasonable price. That’s why it’s crucial to understand which countertop materials are ideal for your needs. These types of kitchen counters are perfect for modern kitchens in general. Before selecting this list, think about the benefits and drawbacks.
- Roofing Options for Your Mobile or Manufactured Home
- Bamboo Flooring Pros and Cons
- Pros and Cons of Professional Termite Damage Repair Services
- Pros and Cons of Garage Air Conditioner
- Pros and Cons of Battery Reconditioning
- Pros and Cons of Undermount Kitchen Sink
- Pros and Cons of Granite Kitchen Sinks
- Pros and Cons of Copper Sinks in Kitchen
- Pros and Cons of Ceramic Kitchen Sinks
- Pros and cons of professional mold remediation
- Pros and Cons of Laminate Flooring in Kitchen
- Pros and Cons of Granite Kitchen Countertops
- Pros and Cons of White Kitchen Cabinets
- Pros and Cons of Single Bowl Kitchen Sink
- Stove In Corner of Kitchen Pros and Cons